
Yet again.. ive been lacking in the blogging department but ive been incredibly busy this past few weeks. Ive started a new job which is taking up surprisingly a large amount of my time as im trying to save up for the festive season! which i am rubbish at doing so i will most likely end up saving 0% of my wages but hey ho its worth a try right?
Ive also been working on both my digital and photography portfolio as its university time! and the time for applying for university. So ive been spending a lot of time doing new styling shoots for my application. But im trying my best to get back up on the blogging horse! ( SOUNDED much better in my head) and start blogging at least 3-4 times each week again now im all sorted. And this post has been waiting to be done for some time so i thought since i have the time i may as well post!
I recently found a book called " chic on a shoe string" showing you how to make clothing, accessories and home decorations on a small budget and you get to make them all yourself which is even more fun! and you can make incredible accessories for a tiny price! which i love but being able to make them yourself is even better. So i decided to make this vintage inspired ribbon flower necklace but changed up the colours a little to red white and blue! so here's a step to step guide on how to make your very own ribbon necklace.
You'll need -
8 buttons, of your choice, but not to heavy!

approximately 8 metres of ribbon, in the colour of your choice


Strong glue and a needle and thread in your chosen colours


Firstly start by making 12 small loops with the ribbon and sewing it all together but not to tightly as you will need to pull out the ribbon to create your flower.

Then pull out to create your flower and then use a small pea sized amount of super glue to hold the flower together,

then sew on your button using your chosen coloured thread.

Repeat this method until your have a total of 12 flowers.

Then to attached all the ribbon flowers together by stitching the flowers together from each of the petals. Using the same coloured thread so the thread is un noticeable. You can change the layout of the flowers depending on your chosen design.
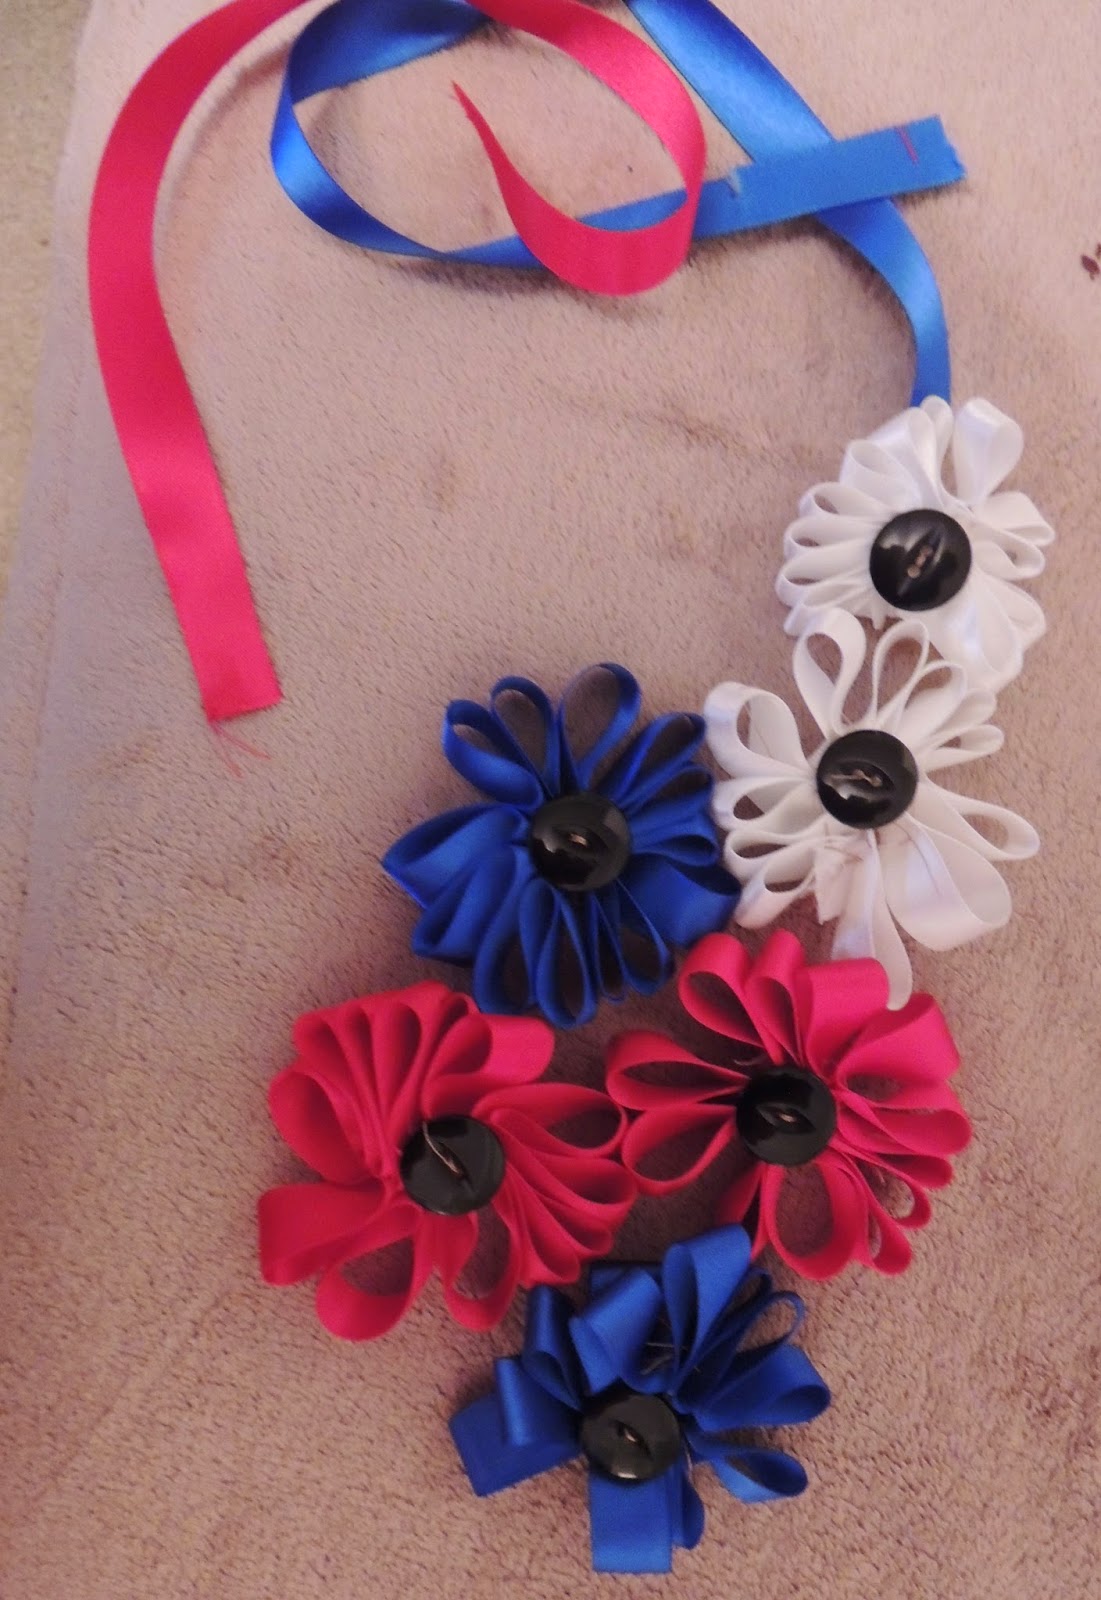
Then finally attach ribbon onto the top two flowers to create the neck fastening. I added a simple bow to my necklace to save time but you could add a fastening or press stud if you choose.
This is one of the simplest necklaces to make except for it isnt for someone who isnt patent as it does take time to perfect the flowers from the ribbon but it is worth it in the end. And it cost me around £3 to make so anyone who wants a statement piece for less this definitely does the trick.


I hope you enjoyed this post! and you give this necklace a go! i am hoping to try out diy projects which i hope to be posting soon!
Original vintage queen!
Awesomely pretty necklace! I love jewelry that involved little to no metal like this, as I'm allergic to nickel, which can be lurking in so many types of metal, but if it isn't present at all that concern becomes entirely moot. Thank you for sharing this terrific how-to, dear gal.
ReplyDelete♥ Jessica